 Pin It
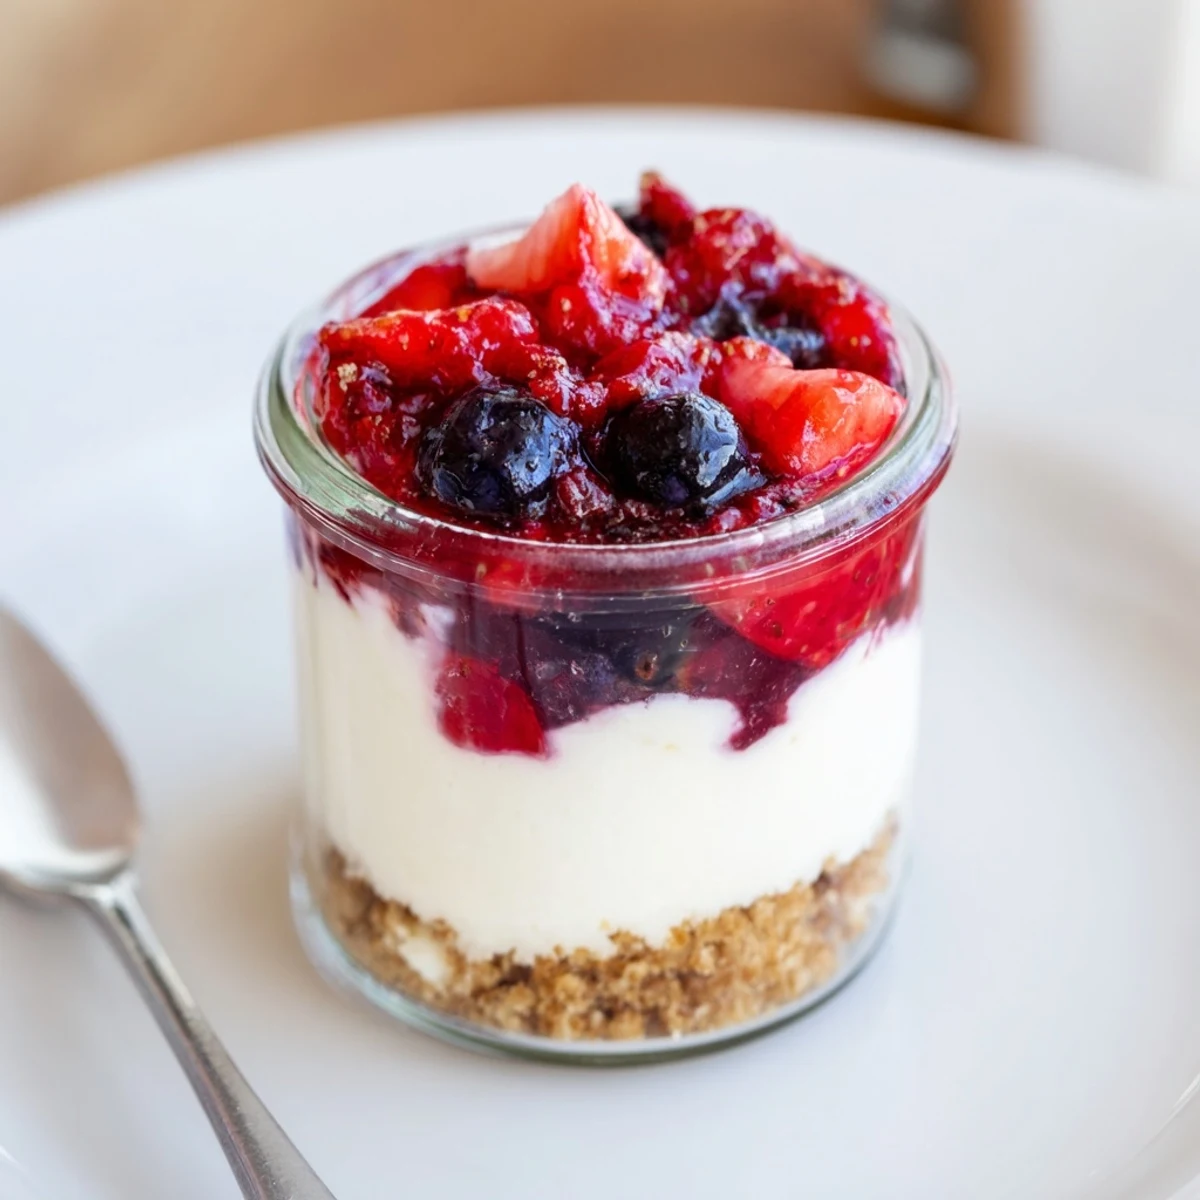
 These no-bake berry cheesecakes layer a crunchy crushed-biscuit base with a whipped, smooth cream cheese filling and a vibrant macerated berry topping. Crush biscuits with melted butter, press into glasses, fold stiff-beaten cream into sweetened cream cheese, spoon over bases and top with sugared berries. Chill at least 3 hours or overnight. Swap gluten-free crumbs or add a splash of liqueur for variation; serve chilled.
The first time I attempted no bake cheesecakes, the summer air outside was so heavy I could not bear the thought of a hot oven. There's a different kind of joy in crushing biscuits and whipping cream while sunlight glints through the kitchen window, radio playing softly in the background. I remember being skeptical that anything so simple could turn into the dreamy, creamy layers I craved. Yet with each step, anticipation took over as bright berry scents began to fill the room.
I once served these berry cheesecakes to friends during an impromptu balcony gathering—the laughter between bites made me realize this dessert is as perfect for lazy afternoons as it is for celebrations. When the berry juice ran down someone’s hand and they grinned, I knew I’d found my fuss-free signature treat.
Ingredients
- Graham crackers or digestive biscuits: Use whichever you have or prefer—crushing them by hand gives the best rustic, sandy texture.
- Unsalted butter: Melted, it brings the crumbs together for a base that stays crisp but melds into the creamy layers above.
- Cream cheese: Let it soften at room temperature for the silkiest filling—years of lumpy mistakes taught me patience here pays off.
- Heavy cream: Must be very cold; a quick chill in the fridge makes for the fluffiest whipped peaks (I’ve even put my mixing bowl in the freezer first).
- Powdered sugar: Dissolves easily for a smooth finish, so do not swap for granulated unless you want grit.
- Vanilla extract: Adds warmth and depth; even a splash makes the flavor sing.
- Lemon zest: Optional, but when I want extra brightness, this fresh zing wakes up the filling.
- Mixed fresh berries: Use as many colors and types as possible—I love strawberries, blueberries, and raspberries together for a burst of flavor and beauty.
- Sugar (for berries): Just a bit is enough to coax juices out, turning berries into glossy jewels.
- Lemon juice: One squeeze makes the topping pop with tartness.
Instructions
- Build the Base:
- Tumble your biscuit crumbs into a bowl and work in the melted butter with your fingertips until sandy but clumpy. Press a layer into each glass or ramekin—listen for that gentle crunch as you go—and set aside.
- Whip the Filling:
- Beat the cream cheese until totally smooth and creamy (no shortcuts on this step). After mixing in powdered sugar, vanilla, and lemon zest, whip your cold heavy cream into billowy peaks and fold it gently into the base—think soft clouds folding into each other.
- Layer the Cream:
- Spoon or pipe the cheesecake filling on top of your biscuit crusts—this is where I sometimes sneak a fingerful, just for quality control.
- Prepare Berry Topping:
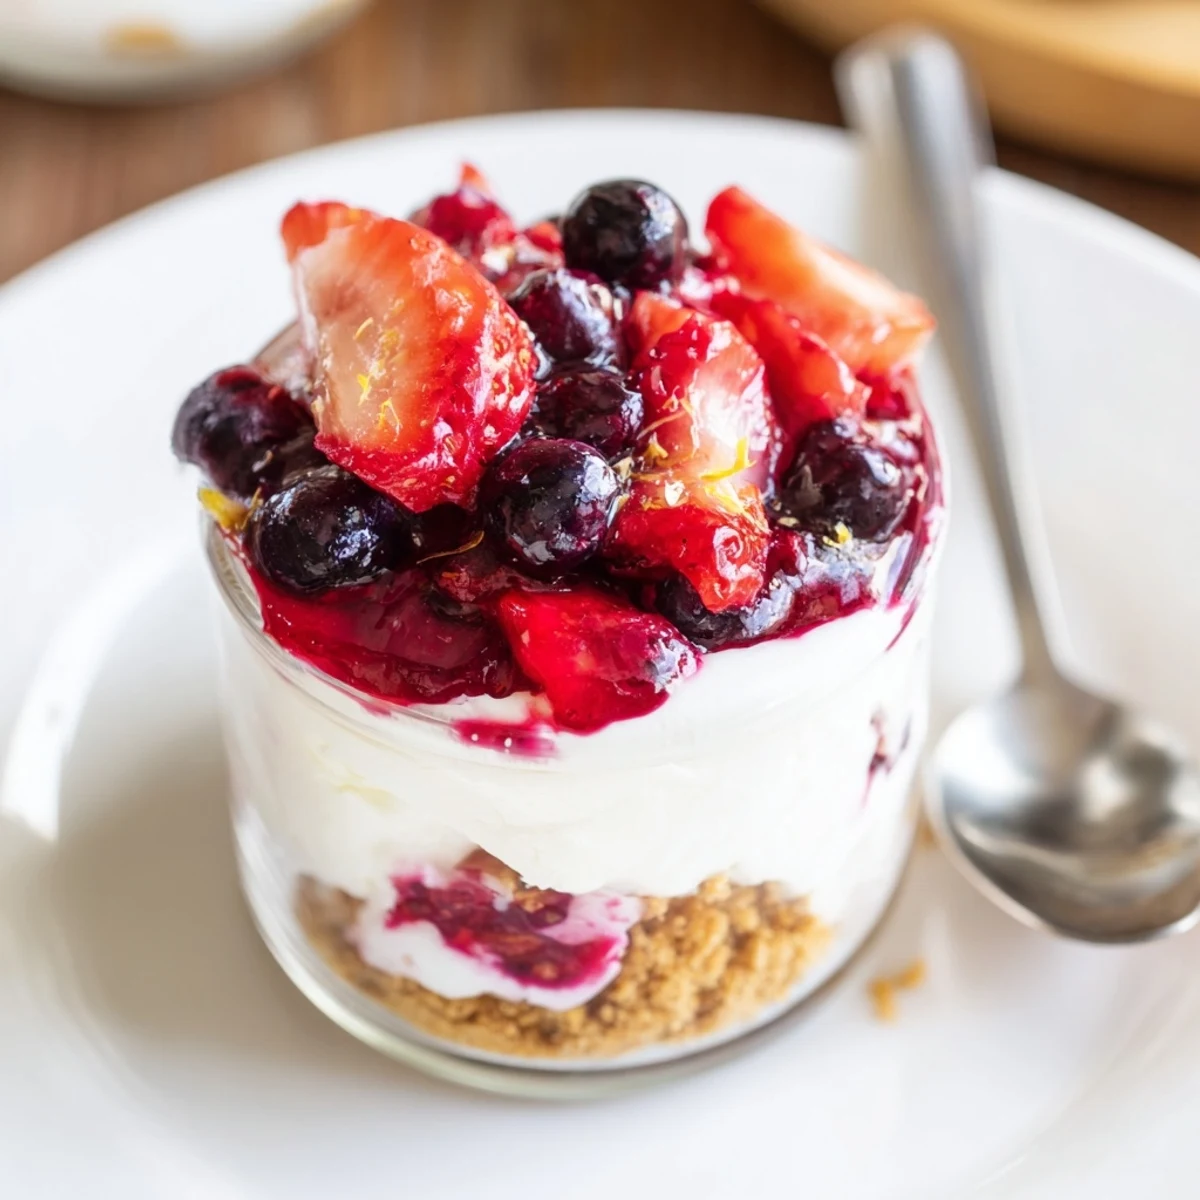
- In a separate bowl, toss the berries with sugar and lemon juice, watching as gloss and color intensify. Let them sit until juicy—the bowl always smells intoxicating, like summer condensed.
- Finish and Chill:
- Spoon the berries and sweet juices generously over the creamy layer. Cover and chill for at least 3 hours so the texture sets, but overnight works best if you can resist.
 Pin It
 Watching friends scrape the last bits from their glasses and ask for the recipe, I realized this dessert was more than a treat—it was a little celebration of summer, no special occasion required.
Making It Your Own
One of my favorite twists is experimenting with different biscuit bases—ginger snaps or shortbread give a whole new character. Sometimes I swap in whatever berries are in season, or even swirl a touch of berry jam into the cream for pops of color and flavor.
Serving Ideas
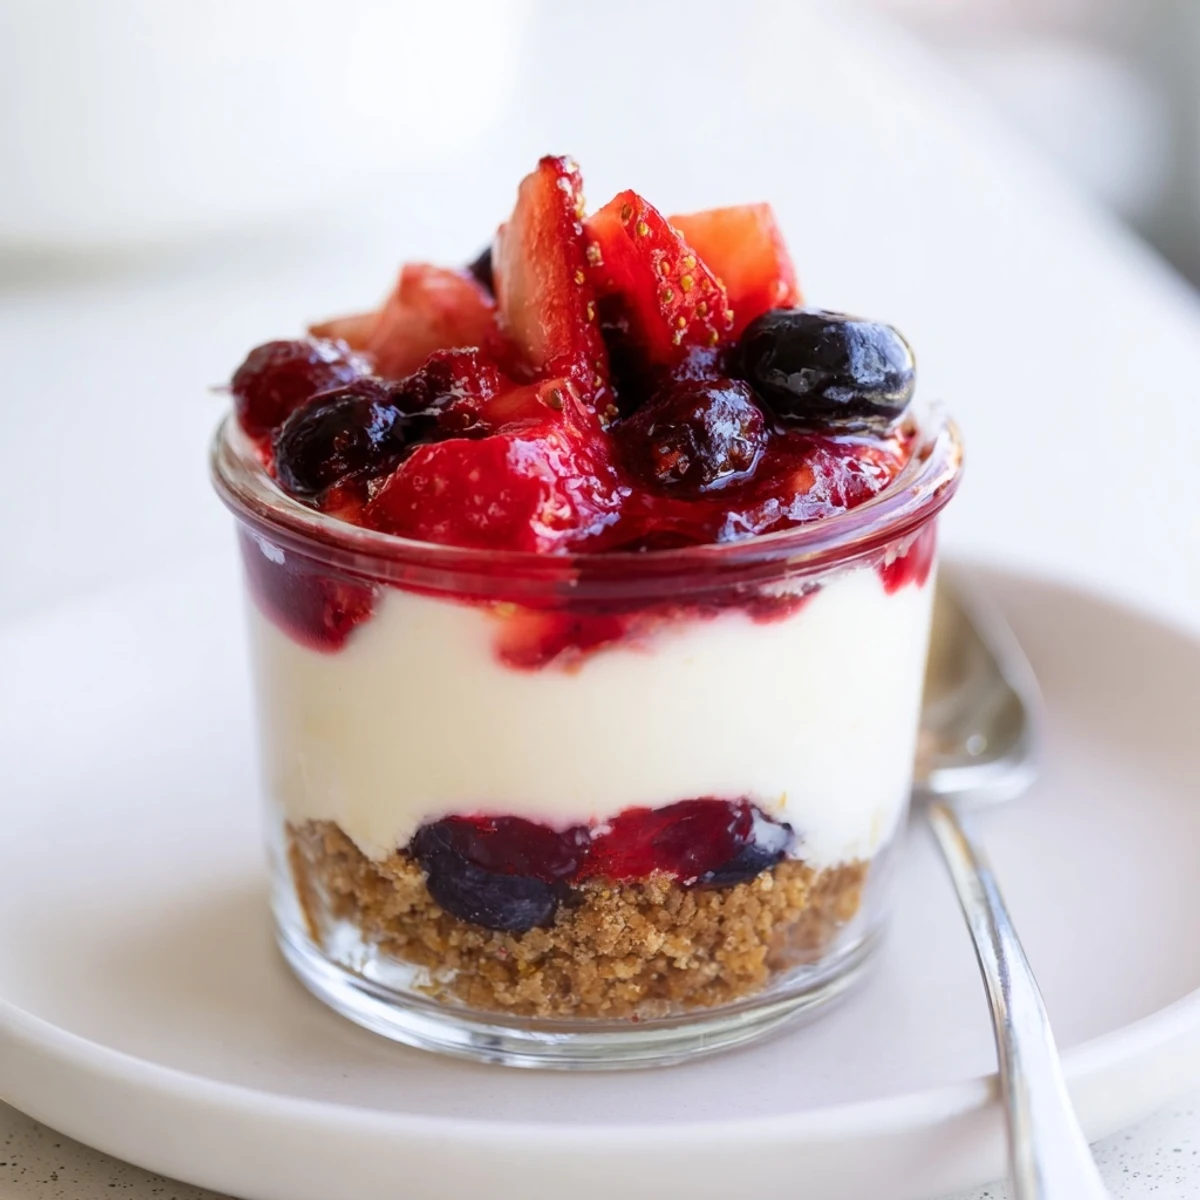
I love assembling these cheesecakes in wide glasses for a showy, layered look, but you can use jars for picnics or gatherings on the go. Sometimes, a sprig of mint or a light dusting of lemon zest on top adds a fresh, cheery touch just before serving.
Troubleshooting and Last Touches
I have learned that even if the berries bleed a bit, it's all part of the charm—there is no pressure for perfection here. Chill the glasses first if you want the layers extra sharp, and always taste your berries before mixing—balance their sweetness to your liking.
- If your filling feels too loose, add a touch more whipped cream and give it extra chill time.
- A dash of berry liqueur in the topping adds a grown-up twist—totally optional but lovely.
- Remember: softness is part of the appeal, so do not overpack your base.
 Pin It
 I hope you find, as I have, that these little cheesecakes bring smiles and ease to any gathering. There is no wrong way to serve something so full of berries and joy.
Recipe Questions & Answers
- → Can I use frozen berries?
-
Yes — thaw thoroughly and drain excess liquid, then toss with sugar and lemon juice to revive flavor. Pat or drain briefly to avoid a soggy topping.
- → How do I achieve stiff peaks?
-
Use very cold heavy cream and chilled bowls/beaters if possible. Whip on medium-high until the cream holds firm, glossy peaks before folding into the cheese mixture.
- → How long should these chill to set?
-
Chill for at least 3 hours to set properly; overnight gives a firmer texture and better sliceability if using larger molds.
- → Can these be made ahead?
-
Yes — assemble and chill up to 24 hours. For best texture, add the berry topping shortly before serving to keep fruit fresh and prevent excess liquid.
- → What are good gluten-free base options?
-
Use gluten-free biscuit crumbs or crushed toasted nuts such as almonds or pecans. Press them firmly with melted butter so the base holds after chilling.
- → How can I prevent a watery berry topping?
-
Toss berries with sugar and let sit briefly, then drain off excess syrup or simmer briefly to reduce into a thicker compote for a cleaner topping.