 Pin It
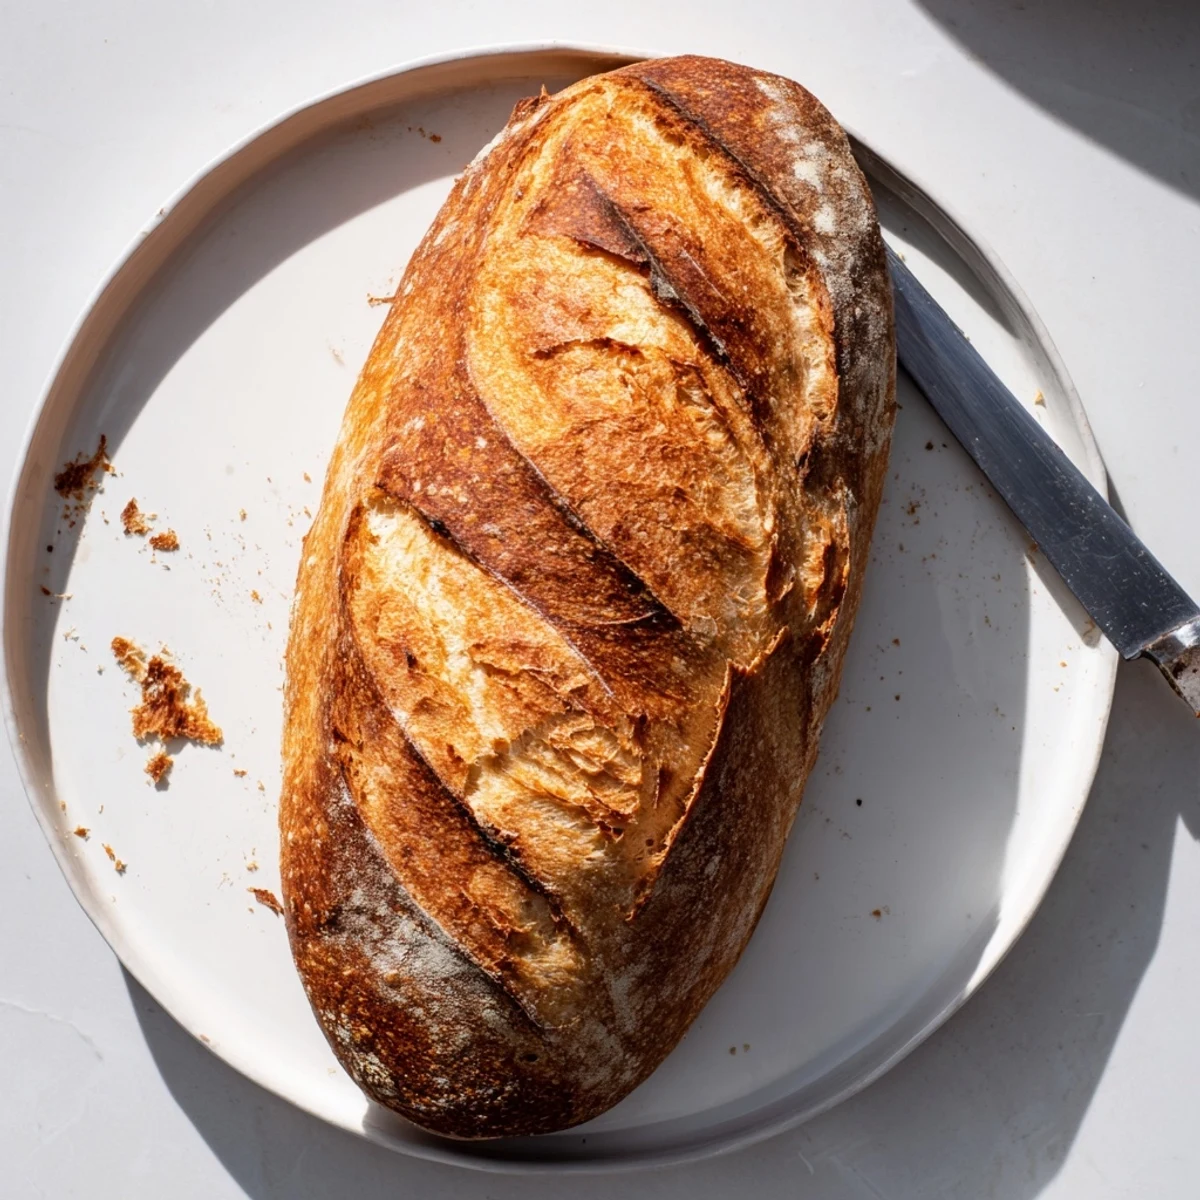
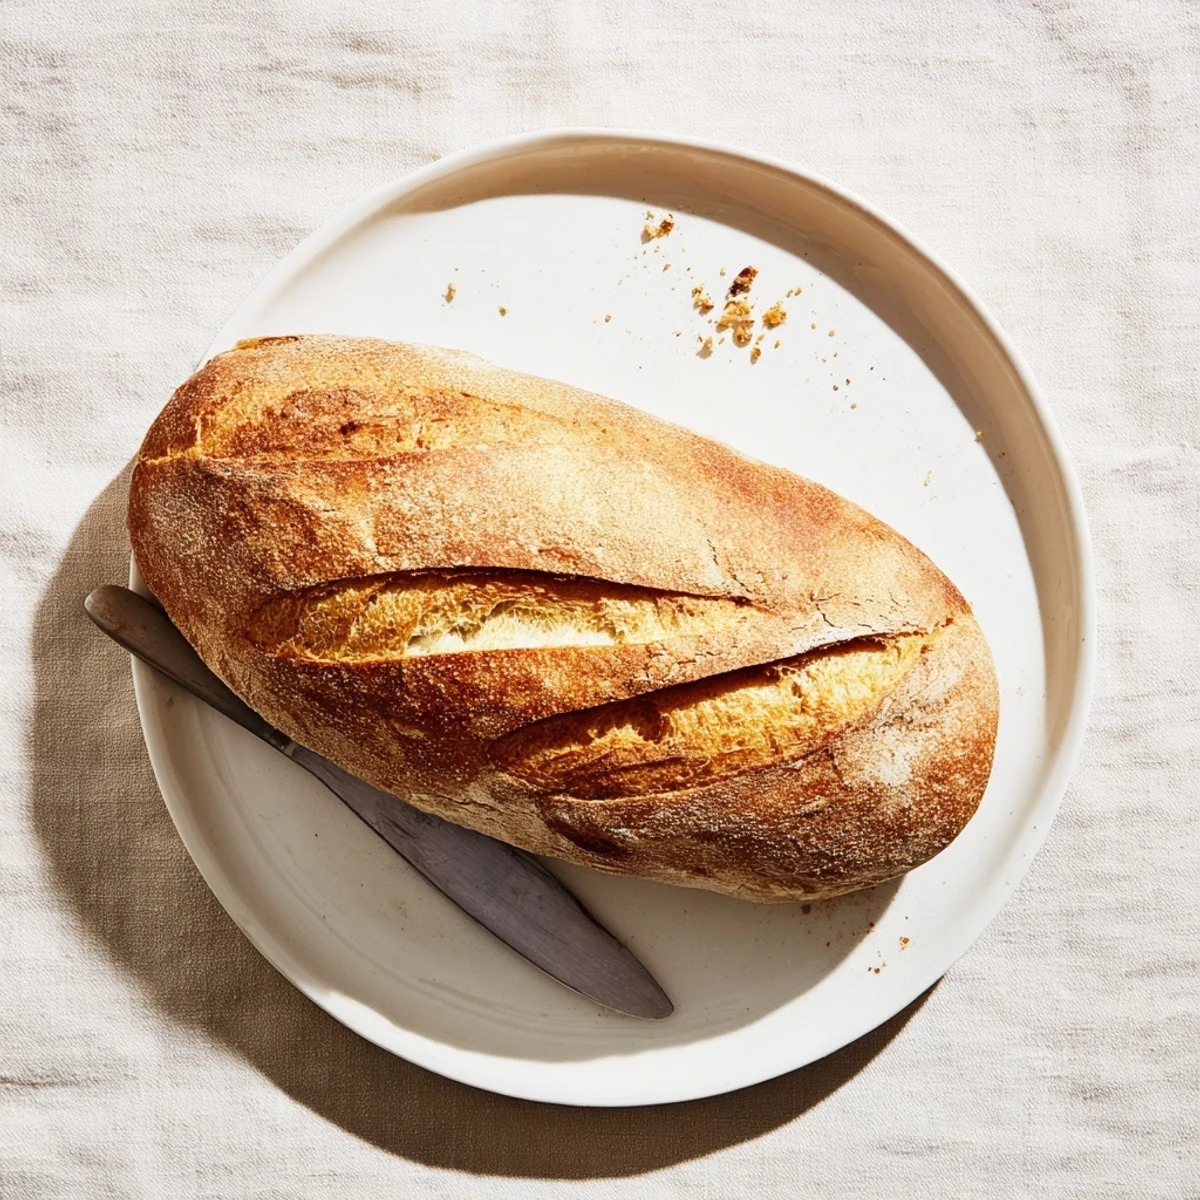
 Craft a traditional Italian loaf featuring a signature golden crust and delightfully chewy crumb. This versatile bread shines when served alongside quality olive oil and balsamic vinegar, transformed into bruschetta, or simply enjoyed warm from the oven. The steam-baking technique creates bakery-style results at home.
The dough develops deep flavors during a leisurely rise, while the high-heat oven with added steam produces that irresistible crackly crust. Slice thick for hearty sandwiches or tear and share at the table.
My tiny apartment smelled like a proper Italian bakery for the first time when I attempted this recipe. The steam trick with the hot water pan changed everything—suddenly my kitchen felt like a nonna's domain in Naples. I've never looked back at store-bought bread since that golden-crusted masterpiece emerged from my oven.
Last winter my neighbor knocked on my door during the final bake, following the incredible aroma. We ended up sharing the still-warm loaf with butter and olive oil right at my counter while the snow fell outside. That bread turned a lonely Tuesday into one of my favorite kitchen memories.
Ingredients
- Bread flour: The higher protein content creates that perfect chewy texture and structure—trust me, all-purpose just won't give you the same satisfying bite
- Active dry yeast: Make sure it's fresh and bubbles up properly, otherwise you'll end up with a dense brick instead of airy perfection
- Olive oil: This keeps the crumb tender and adds subtle richness that balances the salt
- Cornmeal: Not strictly necessary but it prevents sticking and adds such a lovely rustic crunch to the bottom crust
Instructions
- Wake up the yeast:
- Dissolve the yeast and sugar in warm water, watching for that foamy layer that proves it's alive and ready to work its magic
- Build your dough:
- Combine flour and salt, create a well in the center, then pour in the foamy yeast mixture and olive oil until shaggy dough forms
- Develop the gluten:
- Knead on a floured surface for 8–10 minutes until the dough feels smooth and elastic, bouncing back when you press it
- First rise:
- Let the dough rest in an oiled bowl covered with a damp towel until it's doubled in size, about an hour and a half in a cozy corner
- Shape the loaf:
- Gently deflate the dough, form it into a tight oval or round, then place it on parchment or cornmeal-dusted surface for its final 45-minute rise
- Create the steam:
- Preheat to 425°F with an empty metal pan on the bottom rack, then pour hot water into it just before baking for that professional bakery crust
- Bake to perfection:
- Slash the top with a sharp knife, bake for 30–35 minutes until deeply golden, and tap the bottom to hear that hollow sound of doneness
 Pin It
 My sister now requests this bread for every family gathering, claiming it's the only thing her kids will eat without complaint. Watching my nephew tear into a slice with such enthusiasm makes every minute of kneading worth it.
Mastering the Dough Texture
The dough should feel slightly tacky but not sticky—if it's sticking to your hands like glue, add more flour a tablespoon at a time. I learned this the messy way after three failed attempts that left me scraping dough off everything.
Getting Creative with Flavor
Rosemary and garlic have become my go-to additions, kneading them right into the dough during that final fold. Sometimes I'll add sun-dried tomatoes for a chewy, tangy twist that makes phenomenal toast.
Storage and Freezing Tips
This bread actually freezes beautifully if you slice it first, then wrap portions tightly in plastic and foil. Nothing beats pulling out a slice or two and toasting it straight from the freezer.
- Store at room temperature in a paper bag for 2–3 days, never plastic which makes the crust soggy
- Revive day-old bread by sprinkling with water and reheating at 350°F for 10 minutes
- Wrap leftover slices individually for the ultimate convenience
 Pin It
 There's something profoundly satisfying about pulling a warm loaf from the oven you made with your own hands. I hope this recipe brings as many cozy moments to your kitchen as it has to mine.
Recipe Questions & Answers
- → What creates the crispy crust on Italian bread?
-
The steam created by pouring hot water into the preheated baking pan generates a humid oven environment. This moisture allows the dough to expand fully before the crust sets, resulting in that signature crackly exterior.
- → How do I know when the bread is fully baked?
-
The loaf should develop a deep golden-brown color. The most reliable test is tapping the bottom—it should sound hollow when fully cooked. An instant thermometer inserted into the center should read 200°F (93°C).
- → Can I use all-purpose flour instead of bread flour?
-
Bread flour works best due to its higher protein content, which creates the chewy texture. All-purpose flour will yield a softer loaf. For better results with AP flour, consider reducing the water slightly by 1-2 tablespoons.
- → Why is the rising time so long?
-
Extended fermentation develops flavor and creates the proper texture. The yeast needs time to produce gases that create air pockets, while gluten strands strengthen during rest periods. Rushing this process results in dense bread.
- → What's the purpose of scoring the loaf before baking?
-
Scoring with a sharp knife controls where the bread expands during baking. Without these strategic cuts, the dough might burst unpredictably. The slashes also create that attractive artisanal appearance.
- → How should I store this bread?
-
Keep at room room temperature in a paper bag for up to 2 days. For longer storage, slice and freeze in airtight bags—individual slices toast beautifully from frozen. Avoid refrigeration, which accelerates staling.