 Pin It
 Master the art of fishtail braid pie crust to create professional-looking decorative edges. This technique involves cutting dough strips and weaving them into an intricate braid pattern that adorns your pie rim. The process takes about 35 minutes of prep time and yields one stunning 9-inch crust. The key is keeping your dough chilled throughout and working quickly to maintain clean edges. Perfect for holidays, special occasions, or anytime you want to impress with presentation. Works beautifully with fruit fillings, quiches, savory pot pies, and more.
The first time I attempted a braided pie crust, my kitchen looked like a flour bomb had gone off. I was trying to impress dinner guests with what I thought would be an elegant touch, but my braids kept falling apart and I ended up with a rustic, lopsided border. Everyone raved about it anyway, which taught me that people care more about the love in homemade food than Instagram perfection.
My grandmother used to say that fancy edges were for company dinners, but Ive started doing them just for Tuesday night baking. Something about the rhythm of braiding dough is strangely meditative, like knitting but faster and more delicious. Last week I made a quiche with this crust just because it was raining and I needed something cozy to focus on.
Ingredients
- All-purpose flour: The structure that holds everything together, and keeping some nearby for dusting prevents sticking disasters
- Cold butter: Those small visible bits create flaky layers, so work quickly to keep it from melting into your dough
- Salt: Just enough to enhance flavor without making your sweet pie taste like a dinner roll
- Sugar: Optional but adds a subtle sweetness and helps browning, though skip it for savory quiches
- Ice water: The coldest water possible prevents the butter from warming up, which is the secret to tender crust
- Egg wash: Creates that gorgeous golden sheen that makes people ask how you did it
Instructions
- Make your pastry dough:
- Whisk flour with salt and sugar in a large bowl, then work in cold butter with your fingers or pastry cutter until you see pea-sized pieces throughout
- Bring it together:
- Drizzle in ice water a tablespoon at a time, mixing gently with a fork until the dough holds together when squeezed
- Chill thoroughly:
- Divide dough in half, press into disks, wrap and refrigerate for at least an hour since cold dough rolls out evenly and resists shrinking
- Roll and cut strips:
- Roll one disk on a floured surface into a rectangle and cut six even strips about twelve inches long and half an inch wide
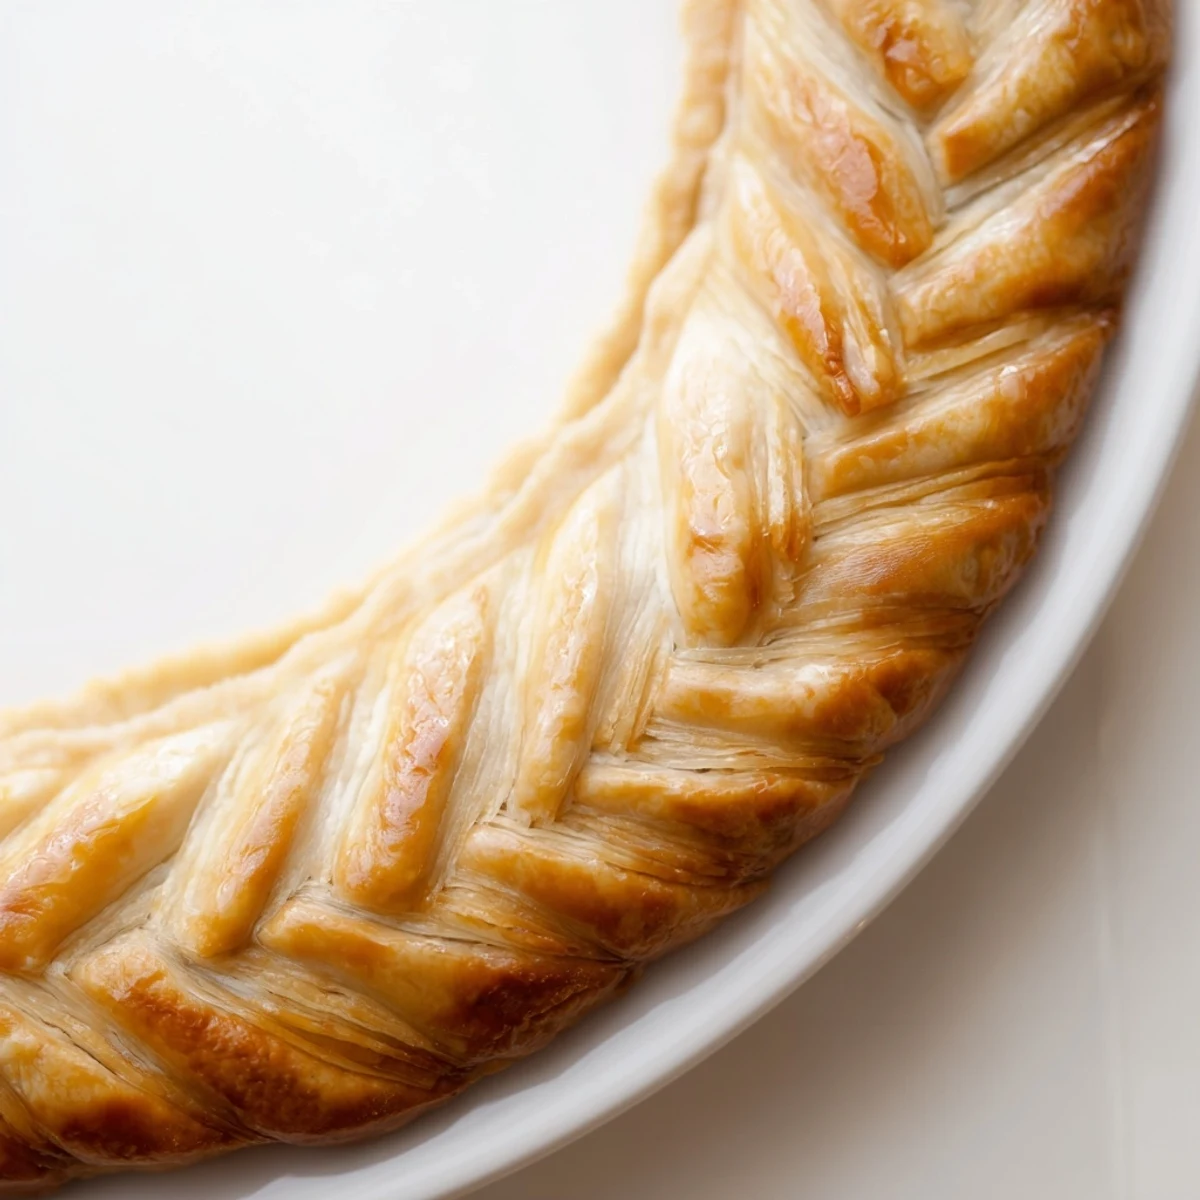
- Create your fishtail braid:
- Take three strips, press ends together, cross outer pieces over the center repeatedly, then pull tightly and press the other end closed
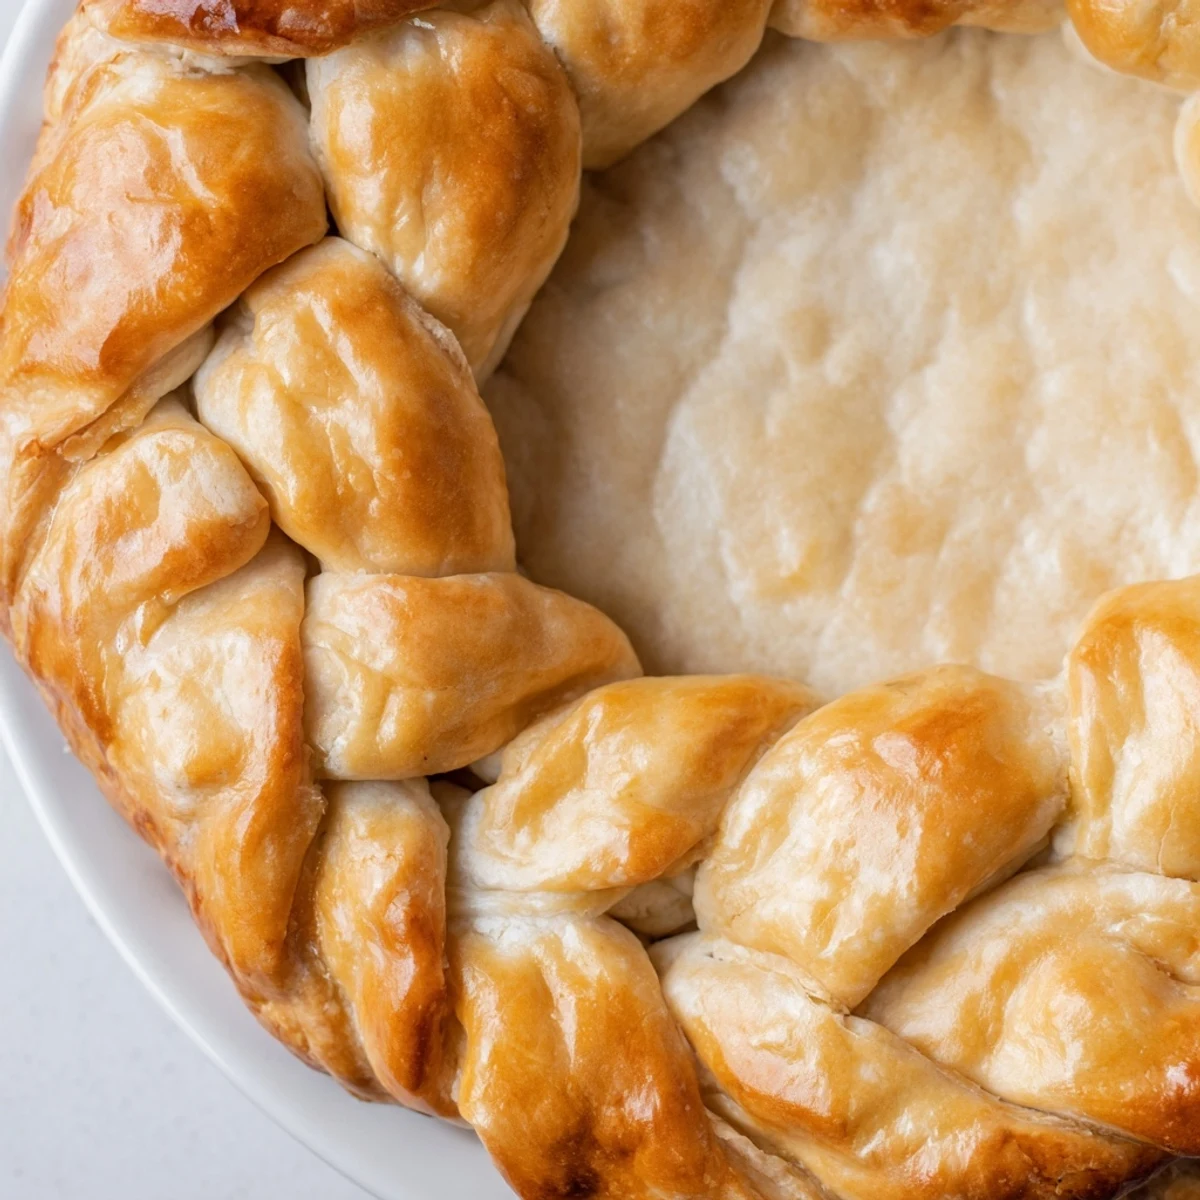
- Attach to your pie:
- Brush water on your filled pie edge, carefully lift and position your braid around the rim, pressing gently to seal
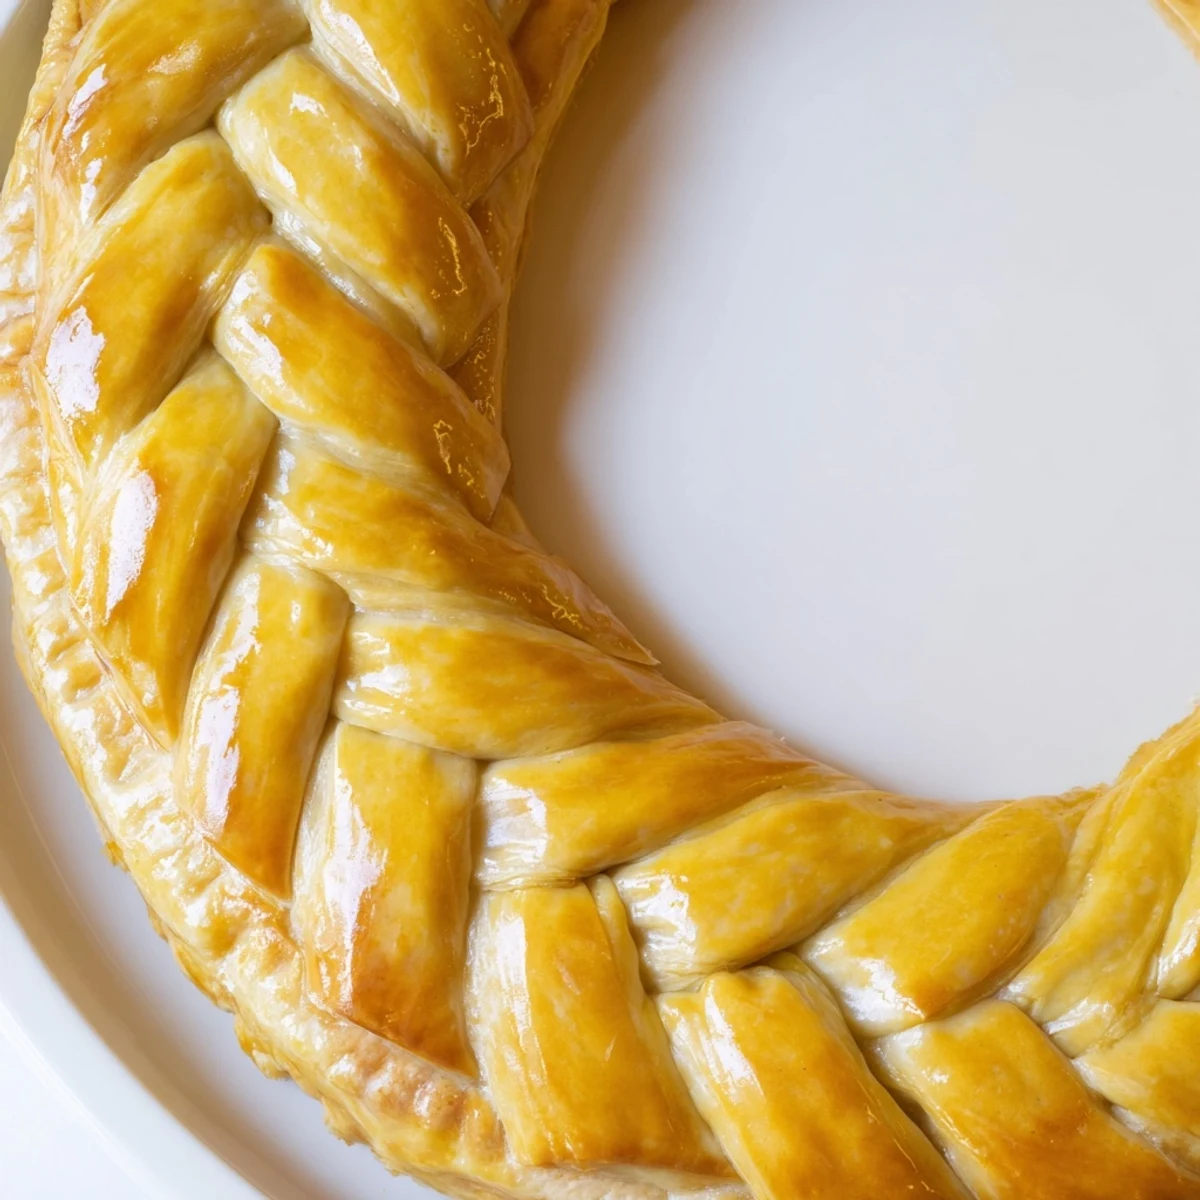
- Add that golden finish:
- Brush the entire braid with beaten egg, then bake according to your recipe until beautifully browned
 Pin It
 I brought this braided apple pie to a neighbors potluck last fall and watched three different people take photos before serving themselves. The host asked for the recipe, but really just wanted to know how long it took since she assumed Id spent hours on the decoration. When I told her the braiding was the quickest part, she looked genuinely shocked.
Working with Temperature
The difference between a tough, shrinkable crust and a tender, flaky masterpiece often comes down to temperature. Cold butter creates steam pockets in the oven, which is what gives you those delightful layers that shatter when you take a bite.
Getting Even Strips
A ruler might feel like overkill until you try cutting freehand strips and end up with varying widths that bake unevenly. Thinner sections brown too fast while thick spots stay pale, so taking two minutes to measure actually saves you from heartburn later.
Assembly Timing
Apply your braids right before baking since the egg wash can make dough soggy if it sits too long. If you're making multiple pies or get interrupted, wrap your braids separately on a baking sheet and keep them chilled until the last possible moment.
- Extra braids freeze beautifully for up to a month
- Pinch repairs before egg washing and no one will notice
- Braids work on both sweet and savory pies equally well
 Pin It
 There is something profoundly satisfying about turning simple ingredients into something that makes people stop and admire before they even taste. Your kitchen will smell like butter and accomplishment.
Recipe Questions & Answers
- → How do I keep the braid from falling apart during baking?
-
Keep your dough thoroughly chilled throughout the process. Work quickly when cutting strips and braiding. If dough becomes soft, return it to the refrigerator for 10-15 minutes. Brushing the pie edge with water before applying the braid helps it adhere securely during baking.
- → Can I make this crust ahead of time?
-
Absolutely. Prepare the dough disks and refrigerate up to 2 days or freeze for up to 3 months. You can also braid the strips separately, freeze them on a baking sheet, then store in freezer bags. Apply frozen braids directly to your pie and add 2-3 extra minutes to baking time.
- → What's the difference between fishtail and regular braid?
-
Regular braids cross outer strands over the middle alternately. Fishtail braids only cross from the outside into the center, creating a flatter, wider pattern that sits beautifully against a pie's curved edge. The fishtail technique produces a more intricate, lattice-like appearance that looks exceptionally professional.
- → Can I use store-bought pie dough?
-
Yes, refrigerated pie dough works well. Let it thaw slightly before rolling, then proceed with cutting strips. However, homemade dough typically produces better braids since you control the hydration and can ensure it's not too soft. If using store-bought, chill thoroughly after cutting strips.
- → Do I need to blind bake the braid separately?
-
Not necessarily. For pies with longer bake times like fruit pies or quiches, apply the raw braid directly before baking. For custard pies or no-bake fillings, blind bake the braid-covered crust at 375°F for 12-15 minutes until golden, then add your filling. The braid holds its shape either way.
- → How many strips do I need for one pie?
-
For a standard 9-inch pie, you'll need at least 6 strips cut to 12 inches long and 1/2 inch wide. This typically creates 2-3 fishtail braids depending on length. Most pies require 2-3 full braids to completely encircle the edge. Roll your dough generously to ensure you have enough for coverage.